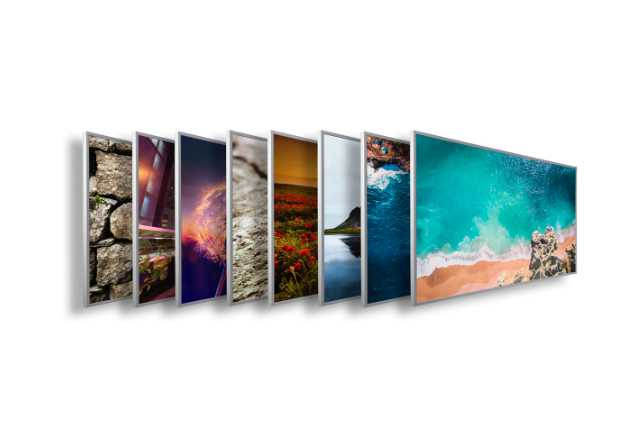
Would you like to print a photo including lettering on your infrared heater? You don’t have the right software or you simply don’t want to spend any money on it? In this article, we have summarized how you can add a personal message to your photo using free software. In this article, you will find a 4-step guide to free image editing for photo heaters.
Just give a picture of the two of you for Mother’s Day? Give your best friend a photo heater as a tribute to your wildest times? Make yourself happy with a photo heater? Good idea, we think! Photo gifts are individual, fun to prepare and always bring joy.
As the saying goes? The journey is the destination. That moment when you finally hand over the gift. Big eyes and lots of joy. How nice that even preparing the picture heater can be so much fun. Sifting through old folders in the depths of your laptop. Browsing through your photos on your smartphone and looking back over the past few years. It brings back a touch of nostalgia.
You already know who you want to give a gift to and have a great photo ready? Wonderful. Now it’s time for the finishing touches. A personal note on the photo such as “Mom is the best”, “Koh Tao, Thailand”, “good food, good life”… You’re sure to come up with something even better! Now you might be wondering how you can get such a slogan on your photo/photo heater. Of course, not everyone has a paid Photoshop license or similar at home. That’s why we’ve looked around for free image editing software for you.
May we introduce: Paint.NET
It is a free software that is an alternative to Adobe Photoshop, for example. Paint.NET falls into the category of graphics software. The project was originally started by a group of students at Washington State University. After just a few months – four to be precise – the group had developed a first version. The program has been continuously improved through several updates (until today). The year of publication is 2004, so there has been a lot of time to optimize the program. Great, isn’t it?
A British web magazine called “Webuser” even presented the software with an award. Paint.NET received full stars in all categories. Well, after this information you surely want to give the software a chance, don’t you?
As the program has grown, so have its developers. They are no longer students. However, two of the former students are still working on further development. Today, however, under the umbrella of Microsoft itself. Paint.NET is therefore a useful tool that users with a Windows operating system can download free of charge.
Don’t worry, the user interface is quite handy and intuitive. Even without any previous knowledge of graphics software, we are sure that you will find your way around quite quickly. So don’t waste any time and let’s get started. Let’s take a closer look behind the scenes and see how the software can help us with the “photo heating” project.
The 4-step guide to image editing
Step 1 to 3: The free image editing program
- Install Paint.NET on your Windows device. It’s very simple. Just follow the steps on the getpaint.net page.
- Have your photo ready. Going through your libraries can take more time than planned. We know that too – the “getting lost in old memories” 😉
- Crop the image to the correct size. This step is optional, but still recommended. Just check what minimum resolution in pixels is required.
In our example, the selected picture heater is an infrared heater with 800 watts. This has dimensions of 100 x 60 cm. To ensure that our image does not end up looking pixelated, a minimum resolution has been set. This is 2,800 x 1,700 pixels for the selected infrared heater. You can find a detailed list of the different sizes and minimum resolutions here.
First, we want to open the image. To do this, we click on File > Open and select the desired file. Your photo will now appear in the graphics software. Then we select the Rectangular selection tool and the Fixed aspect ratio. We now enter our ratio of 5:3. Now we draw a rectangle that shows the desired image section.
Would you like to move your selected rectangle a little? No problem, simply select the Move selection tool and reposition your rectangle. Until you like the position.
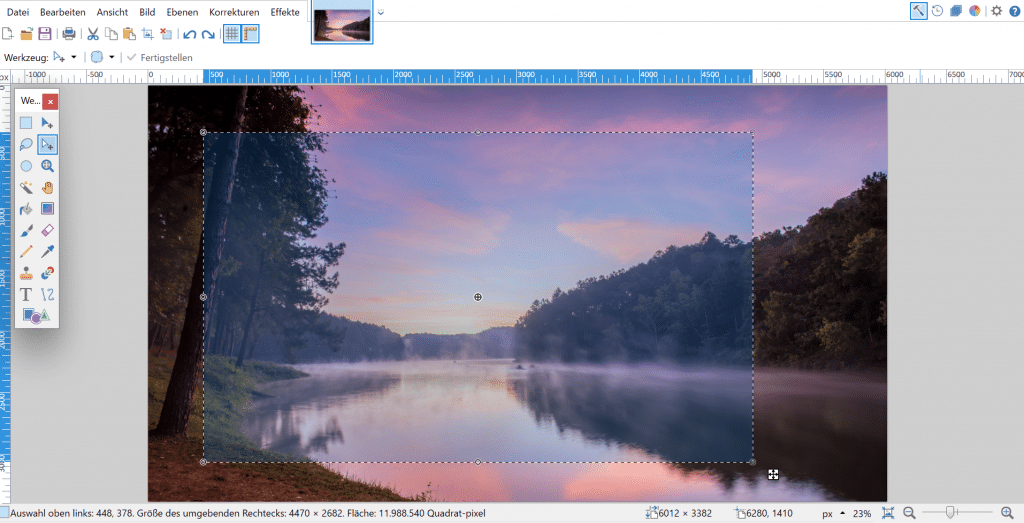
Then click on Crop marker and, voilà, you have resized your image to the correct aspect ratio. Now that we have reduced the size of our image by cropping it, let’s take a look at the bar at the bottom and check whether the minimum resolution is still given. And yes, in our case the minimum resolution is met.
Step 4: Image editing with text
- Write a saying on the picture. So, now finally to the point of this blog post. We would like to write the following text on the picture: “Thank you for the great vacation”. To do this, we select the Text tool. A drop-down menu with lots of different fonts appears in the top bar. Next to it is the font size and then other settings. And take a look at the top right. There you will find the color palette icon. Click on it to open a color palette (bottom right) and you can choose one.
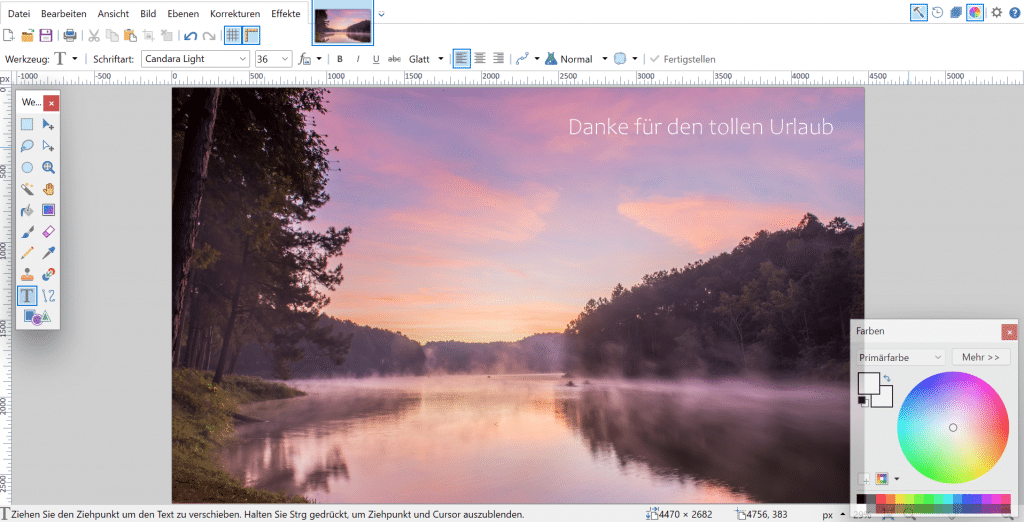
For our picture, we chose the Candara Light font in white and size 36.
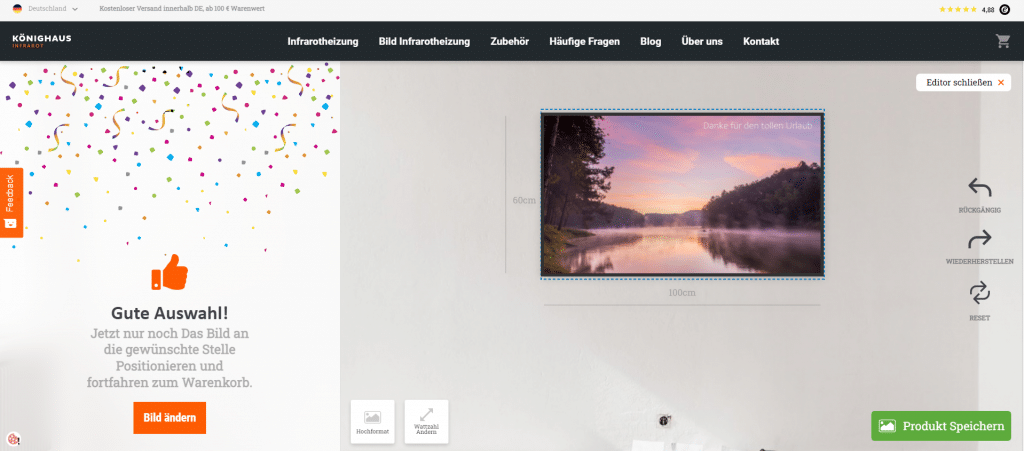
That’s it already! Just save the picture, preferably as a JPG file. Now you can upload your photo in the configurator. Tadaa, this is what it looks like in the preview.
Conclusion
A photo heater is always a personal gift. Whether for someone else or for yourself. With a saying on your photo, you can add a little more individual touch. In the 4-step guide above, we’ve shown you how easy it is to edit photos using free software.
If you have any further questions or need help, simply contact our helpful customer service team. They will be happy to help and advise you. If you would like to know more about photo heaters, take a look at this article: Your infrared heater with your own photo.