Have you ever thought about installing a heater on your ceiling? Sounds crazy? We think: ceiling heating is a sensible and attractive solution for a warm home. Find out how it works and what the advantages of ceiling heating are in this article.
Are you sitting in your living room as you read this blog post? Or maybe in your study? Then just take a look around. What do you see? Probably a conventional convection heater under a window, right? A classic radiator like this heats the ambient air in the room. The air circulates, the heat rises and swirls up the fine dust that is present in every living space. An enormous burden, especially for allergy sufferers.
So what are the advantages of infrared ceiling heating?
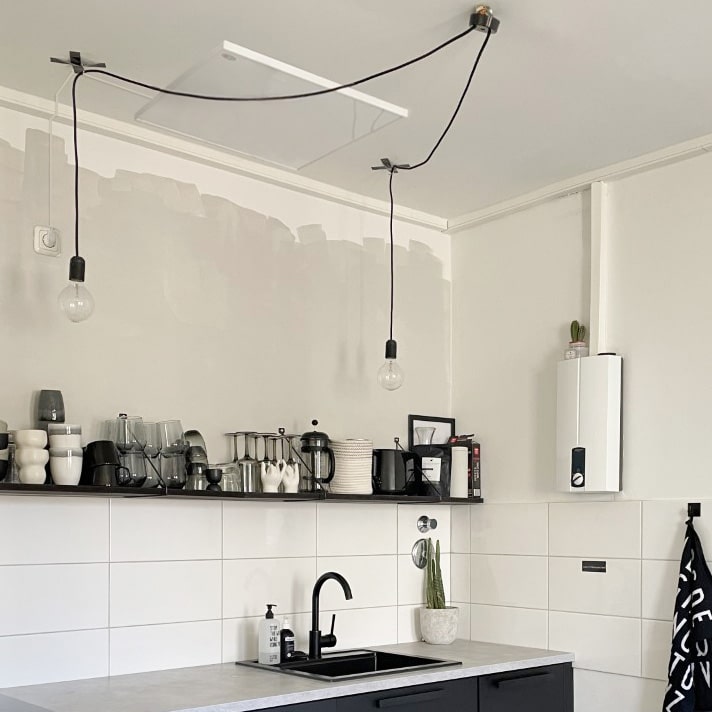
- Installing a white heater on a white ceiling is absolutely inconspicuous. Your visitors won’t even notice the heating and will just be amazed at how pleasantly warm it is in your home. ?
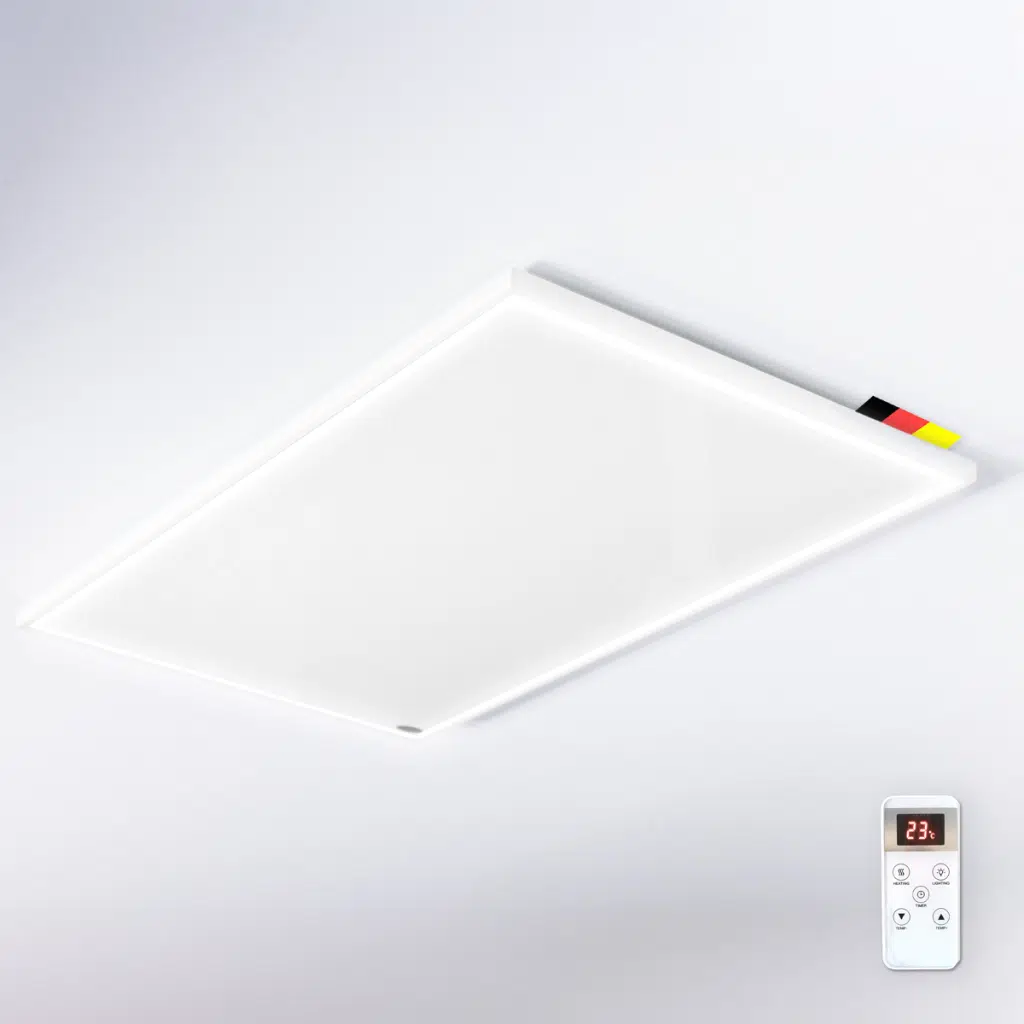
Do you like it more conspicuous? No problem, just have the ceiling heater printed with your favorite motif and a meadow of flowers in the most beautiful colors will radiate from your ceiling. Or would you prefer the Grand Canyon? Or … or … there are no limits to your imagination. Since printing the ceiling heating is a custom-made product, please contact our customer service for this option. - You can position the ceiling heater above your desk or dining table, for example. As infrared heaters do not primarily heat the ambient air, but people, objects and surfaces directly, you can direct the heat to specific areas. For example, the ceiling heater heats the tabletop, which then transfers the heat to the room air. Due to the direct heating effect, infrared heaters are particularly efficient and reach operating temperature in 2-4 minutes.
- Ceiling heaters save space and you have the walls free for other beautiful things such as furniture, pictures, etc. This is a great advantage, especially in small rooms, as the room appears more airy and calm without the classic radiators.
- Installation on the ceiling ensures that the heat rays spread evenly. The room temperature can be lowered by 1-2°C with infrared heaters without any loss of comfort. Particularly in view of the current political situation and the impact on energy costs, every degree less means a direct cost saving. According to experts, one degree less corresponds to an energy saving of 6 percent.
Do you still have questions?
- You may be thinking: all well and good, but won’t I always have cold feet with ceiling heating? After all, my heating hangs from the ceiling and, as everyone knows, the heat rises. Good point, but you really don’t need to worry about that. As we have already learned, infrared heating is radiant heat. The heat does not remain on the ceiling – as is the case with convection heaters – but heats the objects in the room. Furniture, objects, people, etc. are heated and then emit this heat to the surroundings. This means that everything in the room becomes a radiator itself.
Let’s get started – ceiling installation
You have decided to install ceiling heating – we think that’s wonderful and congratulate you on your decision. But what happens now? To make installation and fitting as easy as possible for you, we have listed a few important points here. If you have any further questions, please contact our customer service team.
- Follow the instructions. As we want to be as resource-efficient as possible, you will find installation instructions for each of our heaters on our website. This saves paper and protects the environment.
- If you have a socket on the ceiling, ceiling installation is easy even for non-professionals. Basically, ceiling installation starts with drilling the holes for the wall plugs and fastening the corresponding screws. This allows the heater to be mounted on the ceiling and also provides a gap to ensure a constant supply of air between the ceiling and the infrared heater. After installation, you can connect the heater to the power supply using the 1.80 m long cable – it will be wonderfully warm after 2-4 minutes.
- If you do not have a socket on the ceiling, the ceiling heating is connected to the power line in the flush-mounted installation. In this case, we strongly advise you to contact the appropriate specialists.
- We recommend installing a thermostat so that you can adjust your infrared ceiling heating to your individual needs. With a Smart Home socket thermostat, you can conveniently control your room temperature as required using your smartphone. Whether you’re out shopping or visiting your grandma – thanks to the “Könighaus Smarthome App”, you can set time intervals so that your home is always warm. Practical, isn’t it?
Is there anything else to consider?
- If you are unsure which ceiling heater is right for your needs, please contact our friendly customer service team. In order to calculate the required wattage as precisely as possible, it is helpful to specify the room size, room height, type of room to be heated (garage, basement, living room, etc.), new or old building and, if applicable, the type of floor.
- To give you an idea of an infrared ceiling installation, we show you the video by Jens*. He has installed four Könighaus M-series ceiling heaters in his workshop.
*Please note: Remove the blue protective film before installing a ceiling heating system.
Conclusion
Ceiling installation is a wonderful way to warm your home. The radiant heat emitted by ceiling heating is reminiscent of the sun’s rays with its even heat emission and is therefore generally perceived as particularly pleasant. Even if the actual room temperature is one to two degrees lower than with conventional radiators.
The infrared ceiling heater does not stir up dust and is incredibly space-saving, which is an enormous gain in room capacity, especially in small rooms. In addition, the heating is hardly noticeable on the ceiling and is also perfect for retrofitting thanks to its simple installation.
Want to know more?
We are delighted if we have been able to show you new aspects of infrared heating. There is a lot more exciting information to discover. Here you can find our practical checklist for the fall. Or are you primarily interested in the installation and assembly of infrared heating? Just check our blog regularly – it’s worth it!
If you have any further questions, our friendly customer service team will be happy to help you – by phone, email or chat. We look forward to hearing from you.


